
Features · GUI Creator
The BESSER GUI Creator.
Model, refine, and generate frontend GUIs—deterministically, from a platform-independent model.
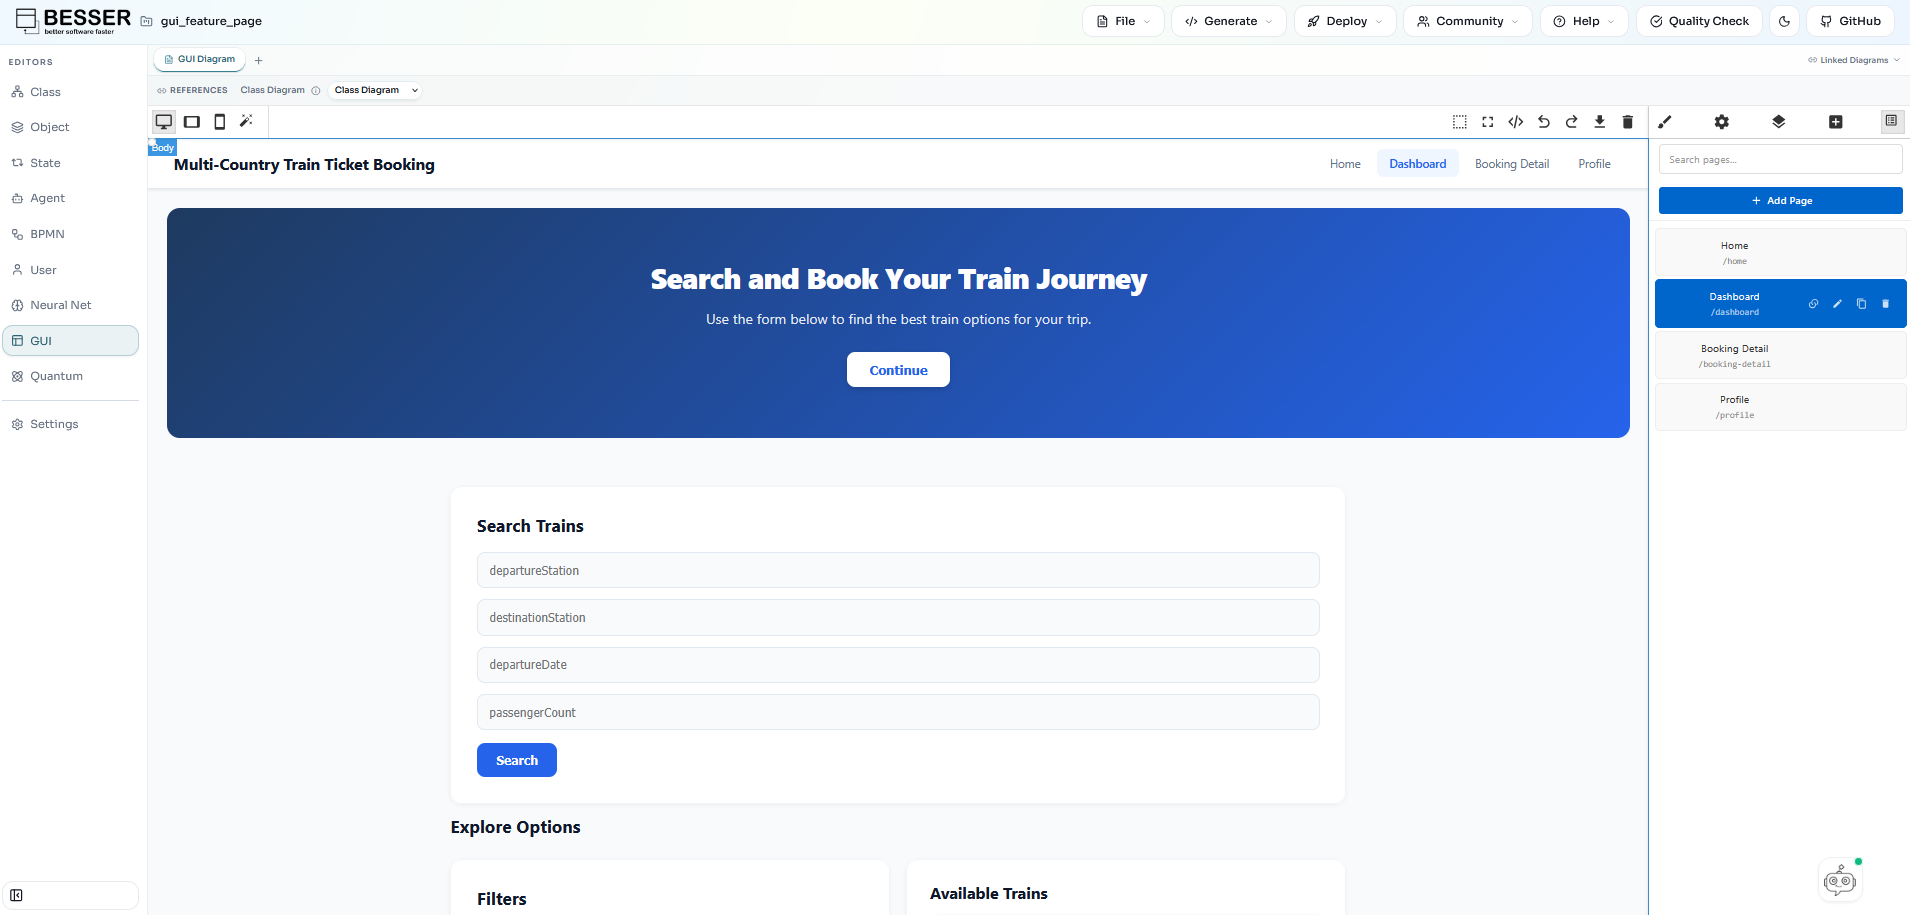
No-Code GUI Editor
The Web Modeling Editor enables you to visually design and refine GUI models — no code required. Describe your interface in natural language, or use drag-and-drop to create screens, define navigation flows, and bind data to UI components—all within a platform-independent model ready for export and code generation.
- Browser-based drag-and-drop modeling
- Screens, view containers, and widgets
- Navigation flows and data binding
- Export to Python B-UML or generate code directly
- Or describe your interface in natural language — the agentic interface builds the model for you
GUI modeling editor
From model to frontend code
From a single GUI model, BESSER generates a complete React frontend — navigation, pages, data-bound tables, forms, and metric cards — ready to run. The panel on the right shows the real React pages generated for a train ticket booking app.
- Navigation and routing from the model's flow
- Data-bound tables and forms per screen
- Metric cards wired to backend entities
- Deterministic, reproducible output
frontend/src/pages/Home.tsx
import React from "react";
import { MetricCardBlock } from "../components/runtime/MetricCardBlock";

// Generated from HomeScreen model — hero + metric cards
const Home: React.FC = () => {
  return (
    <div style={{ fontFamily: "'Inter', system-ui, sans-serif",
                  minHeight: "100vh", background: "#f8fafc" }}>

      {/* Sticky nav — built from navigation flow in the GUI model */}
      <nav style={{ height: 64, padding: "0 32px", position: "sticky",
                    top: 0, zIndex: 50, display: "flex", background: "#fff",
                    borderBottom: "1px solid #e2e8f0", alignItems: "center",
                    justifyContent: "space-between" }}>
        <p style={{ fontSize: "1.25rem", fontWeight: 700, color: "#0f172a" }}>
          {"Multi-Country Train Ticket Booking"}
        </p>
        <div style={{ display: "flex", gap: 4 }}>
          {[
            { label: "Home",           href: "/home",           active: true  },
            { label: "Dashboard",      href: "/dashboard",      active: false },
            { label: "Booking Detail", href: "/booking-detail", active: false },
            { label: "Profile",        href: "/profile",        active: false },
          ].map(({ label, href, active }) => (
            <a key={href} href={href}
               style={{ padding: "8px 16px", fontWeight: active ? 600 : 500,
                        background: active ? "#eff6ff" : "transparent",
                        color: active ? "#2563eb" : "#64748b",
                        borderRadius: 8, textDecoration: "none" }}>
              {label}
            </a>
          ))}
        </div>
      </nav>

      {/* Hero — generated from HeroSection widget */}
      <section style={{ padding: "64px 48px", margin: 24, textAlign: "center",
                        background: "linear-gradient(135deg, #1e3a5f, #2563eb)",
                        color: "#fff", borderRadius: 16 }}>
        <h1 style={{ fontSize: "2.25rem", fontWeight: 800, margin: "0 0 16px" }}>
          {"Book Your Train Tickets Across Europe Effortlessly"}
        </h1>
        <p style={{ maxWidth: 600, margin: "0 auto 28px", opacity: 0.9 }}>
          {"Find and book train journeys between major European cities."}
        </p>
        <button style={{ padding: "12px 28px", fontWeight: 600, cursor: "pointer",
                         background: "#fff", color: "#2563eb",
                         borderRadius: 10, border: "none" }}>
          {"Start Searching"}
        </button>
      </section>

      {/* Metric cards — data-bound to Booking & Route entities */}
      <main style={{ padding: "24px 16px", maxWidth: 1200, margin: "0 auto" }}>
        <section style={{ margin: "12px 24px", display: "grid",
                          gap: 16, gridTemplateColumns: "repeat(4, 1fr)" }}>
          <MetricCardBlock metric={{ metricTitle: "Available Routes",
            format: "number", showTrend: true, value: 0, trend: 12 }} />
          <MetricCardBlock metric={{ metricTitle: "Train Types",
            format: "number", showTrend: true, value: 0, trend: 5  }} />
          <MetricCardBlock metric={{ metricTitle: "Countries Covered",
            format: "number", showTrend: true, value: 0, trend: 2  }} />
          <MetricCardBlock metric={{ metricTitle: "Daily Bookings",
            format: "number", showTrend: true, value: 0, trend: 18 }} />
        </section>
      </main>
    </div>
  );
};

export default Home; More capabilities
And everything else you need.
Walkthrough
See the GUI Creator in action.
Model in the browser, then generate a frontend GUI—no code required.
BESSER GUI Creator — walkthrough